
Customize Your HyperX Gear with NGENUITY
Take full control of your HyperX keyboards, mice, headsets, and microphones. Set up RGB lighting, program macros, adjust DPI, and create custom profiles — all from one app.
What HyperX NGENUITY Can Do
One app to control every compatible HyperX peripheral you own. Lighting, macros, audio, sensitivity — it handles all of it without needing separate software for each device.
Per-Key RGB Lighting
Paint individual keys with any color you want, or pick from built-in effects like wave, breathing, and reactive typing. The color picker supports full 16.8 million colors, and you can layer multiple effects on a single keyboard.
Macro Recording
Record complex key sequences and bind them to a single button press. Set delays between inputs, choose between toggle and hold modes, and assign macros to any programmable key on your HyperX keyboard or mouse.
DPI & Sensitivity Control
Configure up to five DPI stages for your HyperX mouse and swap between them on the fly. You can also adjust the polling rate (up to 1000Hz on supported models) for tighter response times in competitive games.
Button Remapping
Reassign what any button does on your mouse or keyboard. Swap your side buttons, bind media controls to function keys, or set up shortcuts that match how you actually play and work.
Audio Equalizer
Fine-tune your headset sound with a multi-band EQ. Pick from presets like FPS, music, or bass boost, or drag the sliders yourself. Works with HyperX Cloud headsets that support NGENUITY.
Microphone Tuning
Adjust mic gain, enable sidetone monitoring, and tweak input sensitivity on HyperX QuadCast and DuoCast microphones. You can hear exactly what your mic picks up before going live or joining a call.
Multiple Device Profiles
Save different configurations as profiles and switch between them in seconds. Keep one profile for gaming with low DPI and reactive lighting, and another for daily use with calm colors and standard key bindings.
Game-Linked Auto-Switch
Link profiles to specific games or applications. When you launch a title, NGENUITY automatically loads the matching profile — lighting, macros, DPI, everything — then switches back when you close it.
Firmware Updates
Keep your HyperX gear running the latest firmware directly through NGENUITY. The app checks for available updates and walks you through the process. No need to hunt for files on the HyperX website.
Cloud Profile Sync
Sign in and save your profiles to the cloud so they follow you between PCs. Useful if you switch between a desktop at home and a laptop elsewhere — your lighting, macros, and settings carry over automatically.
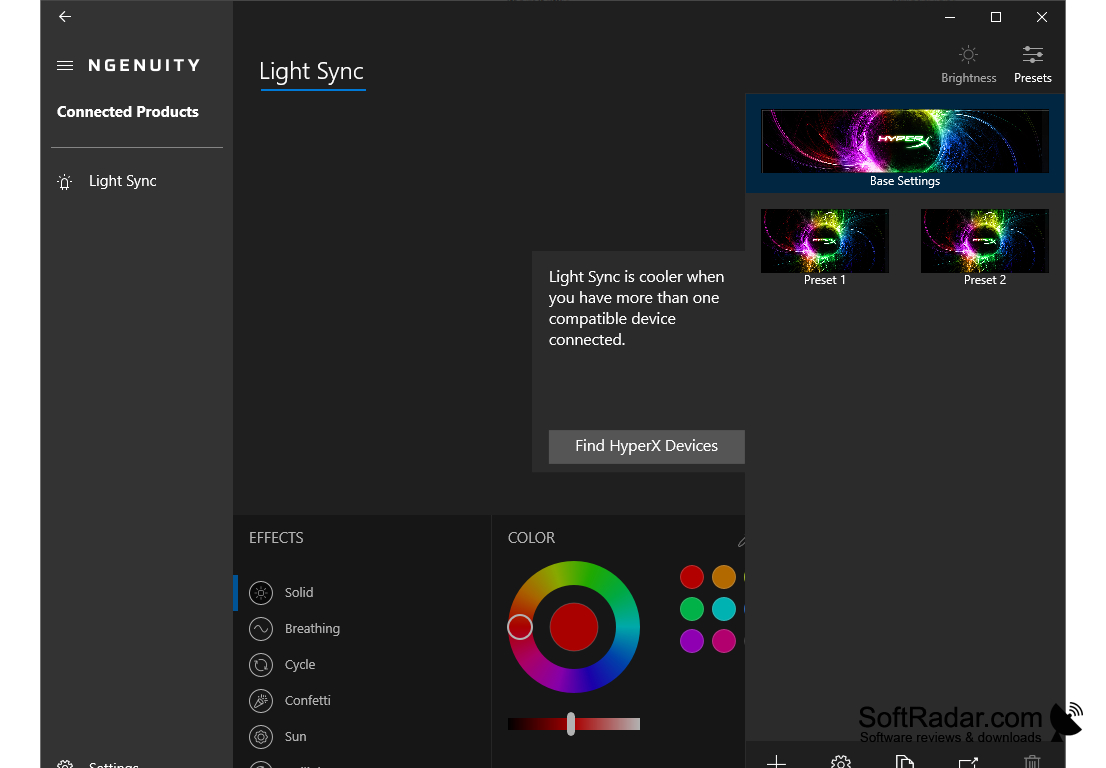
Preset Effect Library
Browse a collection of pre-built lighting effects and configurations. Apply them with one click and customize from there. Handy if you want a starting point without building effects from scratch every time.
Unified Device Dashboard
See all your connected HyperX peripherals in a single interface. Keyboards, mice, headsets, and microphones show up automatically. No juggling between different apps the way you might with Razer Synapse or Corsair iCUE.
All features work with compatible HyperX peripherals. Download HyperX NGENUITY to get started.
System Requirements
Check that your PC meets these specs before installing HyperX NGENUITY. The software runs on modern Windows systems with a USB connection for your peripherals.
| Component | Minimum | Recommended |
|---|---|---|
| Operating System | Windows 10 64-bit (version 1903 or later) | Windows 11 64-bit (latest update) |
| Processor | Intel Core i3 / AMD Ryzen 3 or equivalent | Intel Core i5 / AMD Ryzen 5 or better |
| RAM | 4 GB | 8 GB or more |
| Storage | 2 GB free disk space | 4 GB free disk space (for firmware cache) |
| Display | 1280 x 720 resolution | 1920 x 1080 (Full HD) or higher |
| USB | USB 2.0 port | USB 3.0 port for faster data transfer |
| Internet | Required for firmware updates and cloud sync | Broadband connection for large firmware files |
| Runtime | .NET Framework 4.7.2 or later | .NET 6.0 Runtime (bundled with installer) |
HyperX NGENUITY is a Windows-only application. macOS and Linux are not supported. You can also install it through the Microsoft Store for automatic updates.
Download HyperX NGENUITY
Get the official HyperX peripheral software for Windows. Customize your RGB lighting, macros, DPI stages, and audio profiles in minutes.
HyperX NGENUITY for Windows
Requires Windows 10 version 1903 or later (64-bit only)
Direct Installer (EXE)
Standalone installer from the HyperX CDN. Works offline after download. Run as administrator for the smoothest setup.
Download EXE (416 MB)Microsoft Store
Install through the Microsoft Store for automatic updates and easy management. Recommended by HyperX for most users.
Open in Microsoft StoreBefore You Install
HyperX NGENUITY works with Windows 10 (version 1903 and later) and Windows 11 on 64-bit systems. You will need about 2 GB of free disk space and a USB port for your HyperX peripheral. An internet connection is needed for firmware updates and cloud sync, but the core software runs fine offline.
If you already have an older version installed, the new installer handles the upgrade automatically. The Microsoft Store version stays up to date on its own, while the EXE installer requires a manual download when new releases come out.
HyperX NGENUITY is Windows-only software. There is no official macOS or Linux version available at this time.
Need help setting things up? Check out the Getting Started guide below.
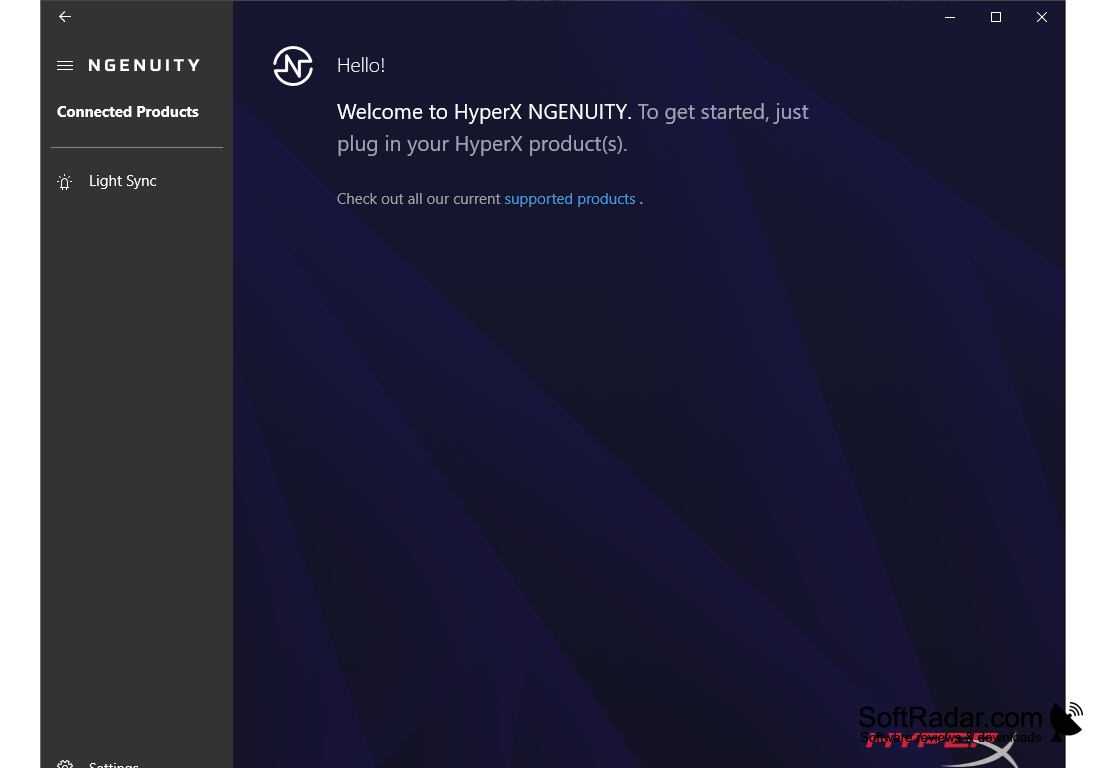
HyperX NGENUITY in Action
See how the software looks when configuring your HyperX peripherals. Click any image to view it full size.
Getting Started with HyperX NGENUITY
From download to your first custom RGB profile in under 10 minutes. Here is everything you need to set up HyperX NGENUITY and start personalizing your gear.
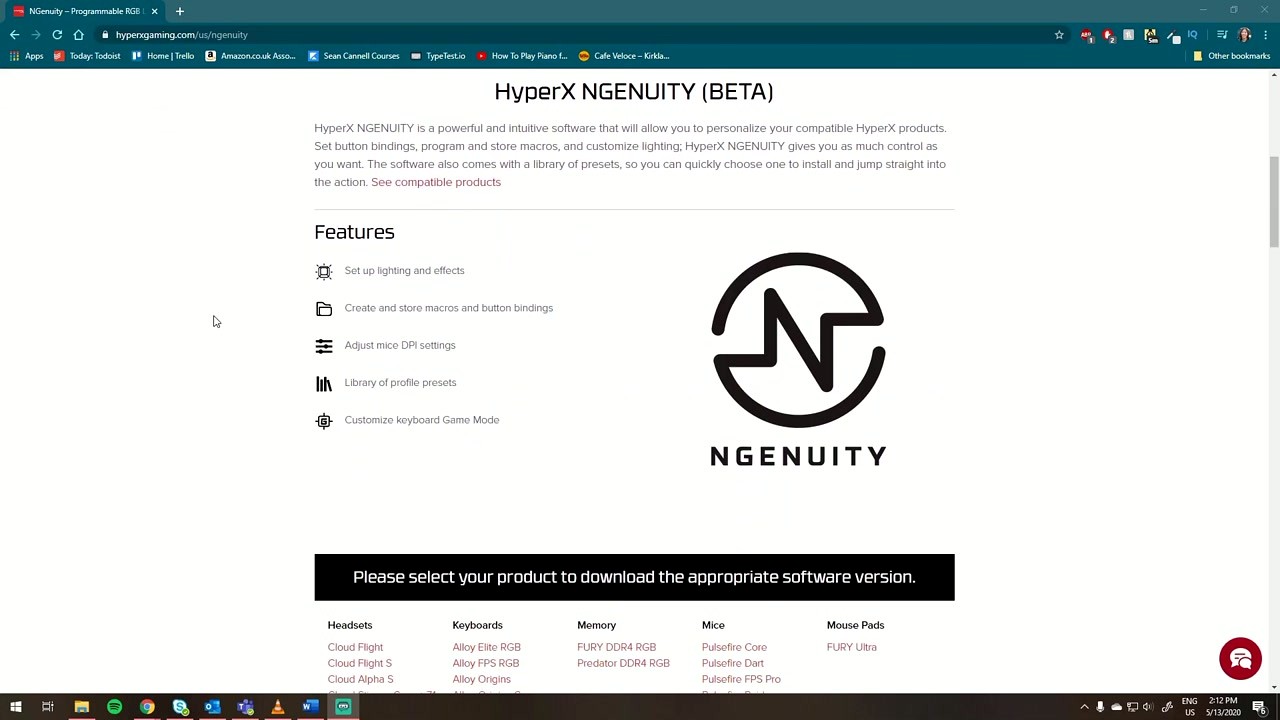
Head to our download section above to grab the latest version of HyperX NGENUITY. You have two options: the standalone EXE installer (about 416 MB) or the Microsoft Store version. Both are free and functionally identical.
The EXE installer (HyperX_NGENUITY_Installer_2.35.0.0.exe) is a standard Windows setup file. Download it, double-click, and you are up and running. This is the better choice if you want to control where the software gets installed or if your Microsoft Store has issues. The file is roughly 416 MB, so expect 2-5 minutes on a typical broadband connection.
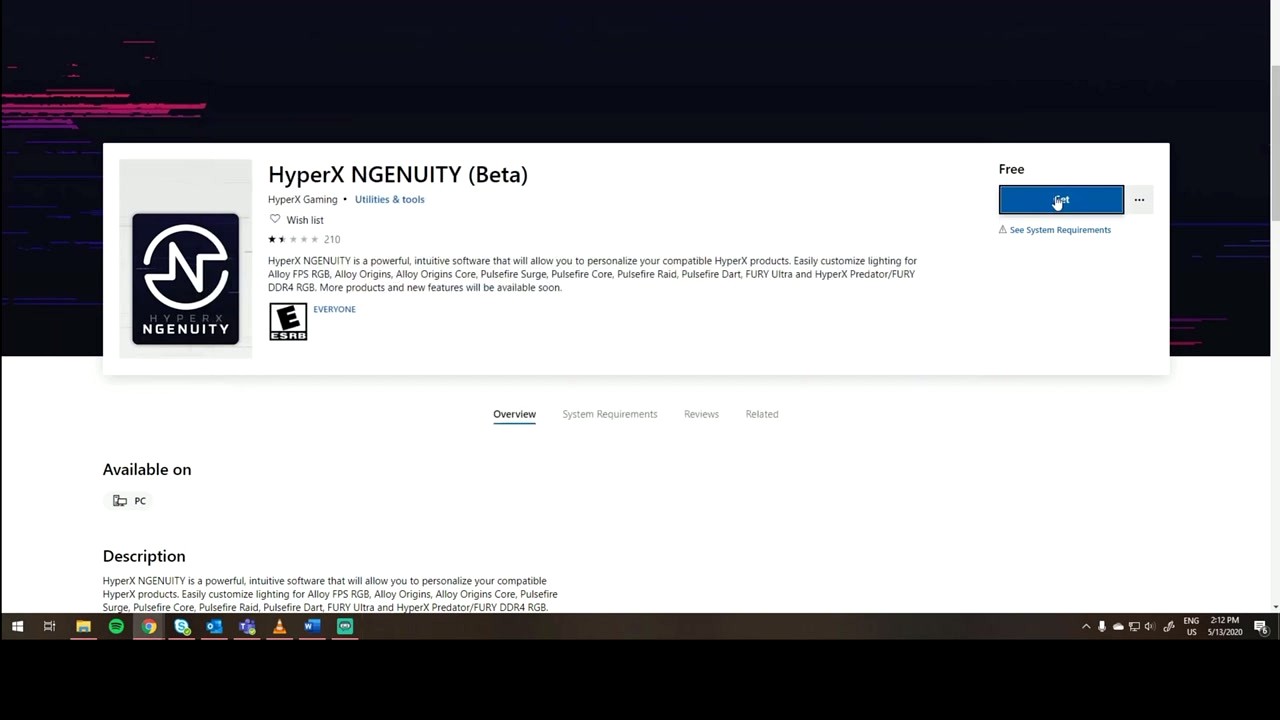
The Microsoft Store version installs and updates automatically through Windows. If you prefer a hands-off approach where the app stays current without you thinking about it, the Store is the way to go. Search for “HyperX NGENUITY” in the Microsoft Store app or visit the listing directly.
HyperX NGENUITY only supports Windows 10 (64-bit, version 1903 or later) and Windows 11. There is no macOS or Linux version. If you are on an older 32-bit Windows build, you will need to upgrade your OS first.
Using the EXE installer:
- Run the installer. Right-click
HyperX_NGENUITY_Installer_2.35.0.0.exeand select “Run as administrator.” If Windows SmartScreen pops up with a blue warning, click More info and then Run anyway — the file is signed by HP Inc. and verified safe. - Accept the license agreement. The installer shows the HyperX EULA. Read through it (or at least skim it), then check the acceptance box and click Next.
- Choose the install location. The default path is
C:Program FilesHyperXNGENUITY. Unless you have a specific reason to change it (like a small C: drive), keep the default and click Next. - Component selection. The installer may offer optional components like desktop shortcut and Start Menu entry. Leave both checked for easy access. There are no bundled toolbars or third-party add-ons to worry about.
- Click Install and wait about 30-60 seconds. The installer extracts files and registers the necessary USB device drivers. You will see a progress bar fill up.
- Finish. Check “Launch HyperX NGENUITY” and click Finish. The app opens immediately.
Using the Microsoft Store:
- Open the Microsoft Store app on your PC (press the Windows key and type “Microsoft Store”).
- Search for “HyperX NGENUITY” in the search bar.
- Click Get or Install. The download starts automatically. Since the Store version is about 400 MB, this takes a few minutes.
- Once installed, click Open from the Store page, or find “HyperX NGENUITY” in your Start Menu.
The software requires about 2 GB of free disk space and needs a USB 2.0 port or newer. Make sure your HyperX device is plugged in before you first open the app.
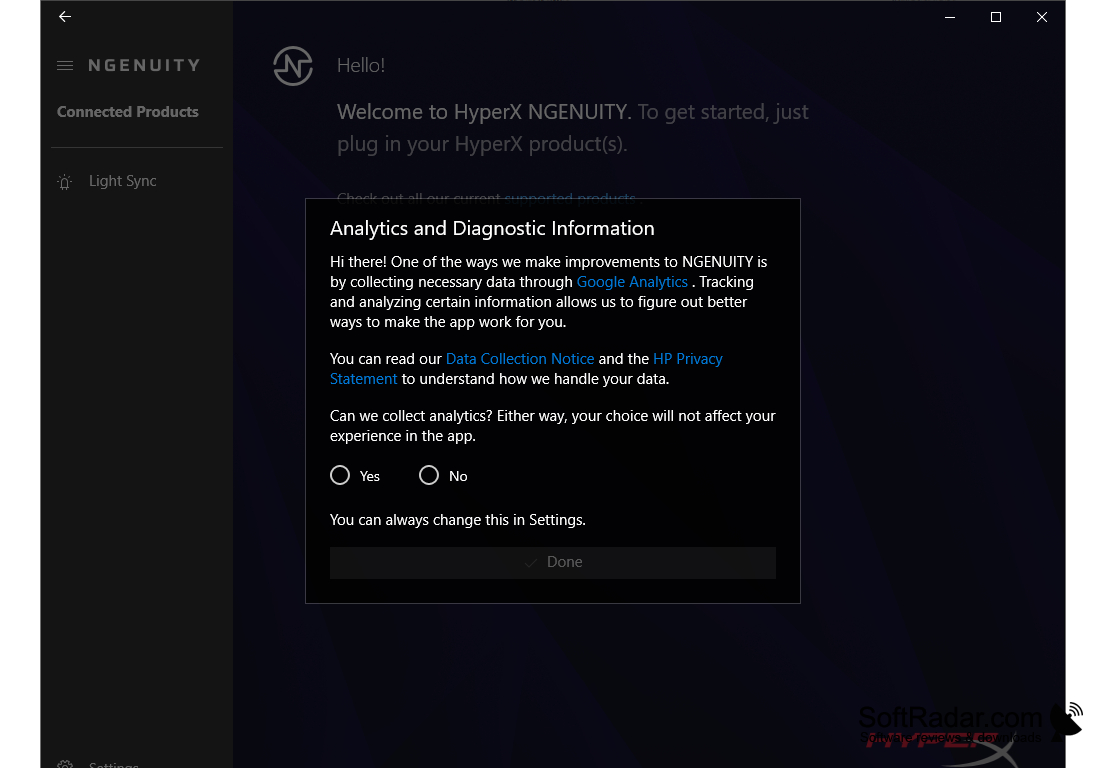
When you launch HyperX NGENUITY for the first time, the app scans your USB ports for compatible HyperX devices. If a supported peripheral is connected, it appears on the main dashboard with its product image and name. If nothing shows up, unplug the device, wait a few seconds, and plug it back in.
First things to configure:
- Firmware updates. Click on your device and look for a notification icon (usually a small bell or badge) in the top-right corner. If a firmware update is available, install it first. Firmware updates fix bugs and sometimes unlock new lighting effects or features. The update takes 1-3 minutes and you should not unplug the device during the process.
- Create a HyperX account. Click the profile icon in the top-right corner and sign up. This enables cloud sync, which saves your profiles, macros, and lighting configurations to the cloud. If you reinstall Windows or switch PCs, your settings come right back.
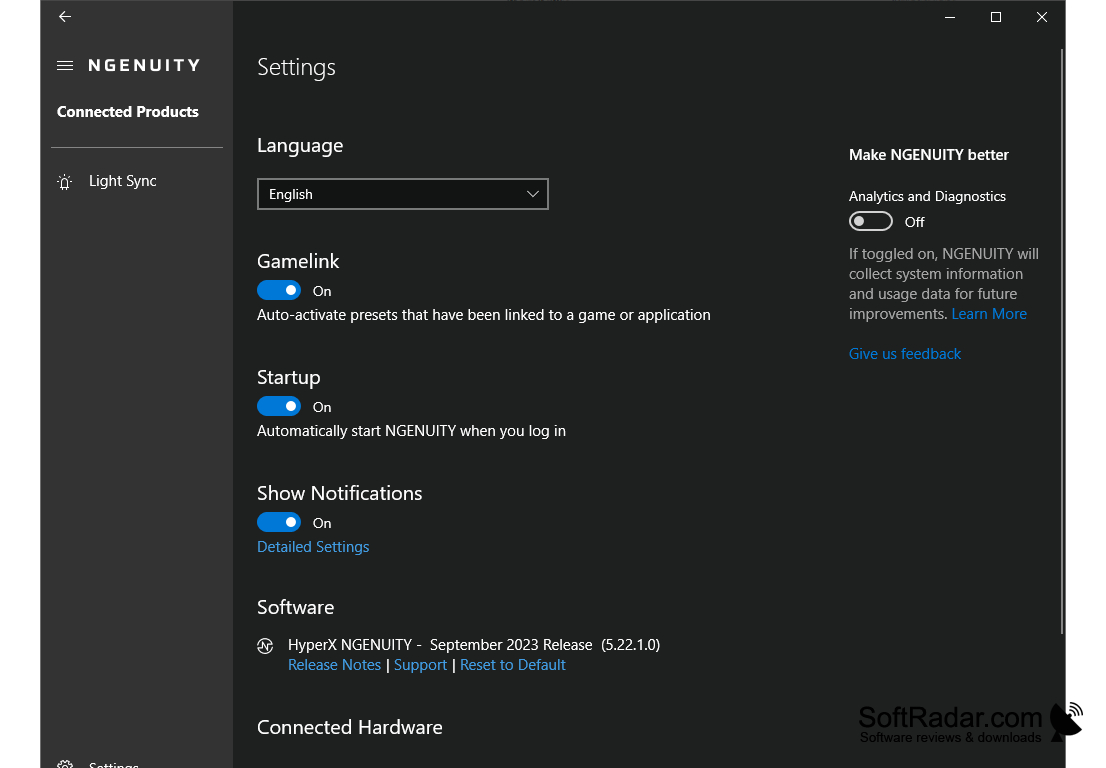
- Check device settings. Click your device, then navigate to the Settings tab. For keyboards, set your preferred polling rate (1000 Hz for gaming, 500 Hz for general use). For mice, check that the DPI stages match your sensitivity preferences. For headsets, verify the audio output format matches your system settings.
If you own multiple HyperX devices, they all appear on the main dashboard. Click any device to open its configuration panel. The sidebar navigation shows tabs for Lighting, Macros, DPI (mice), Audio (headsets), and Profiles.
Let’s create a custom lighting profile for a keyboard. This walkthrough works with any HyperX Alloy keyboard that supports per-key RGB.
- Select your keyboard from the main dashboard. The keyboard layout appears in the center panel with each key rendered as an interactive block.
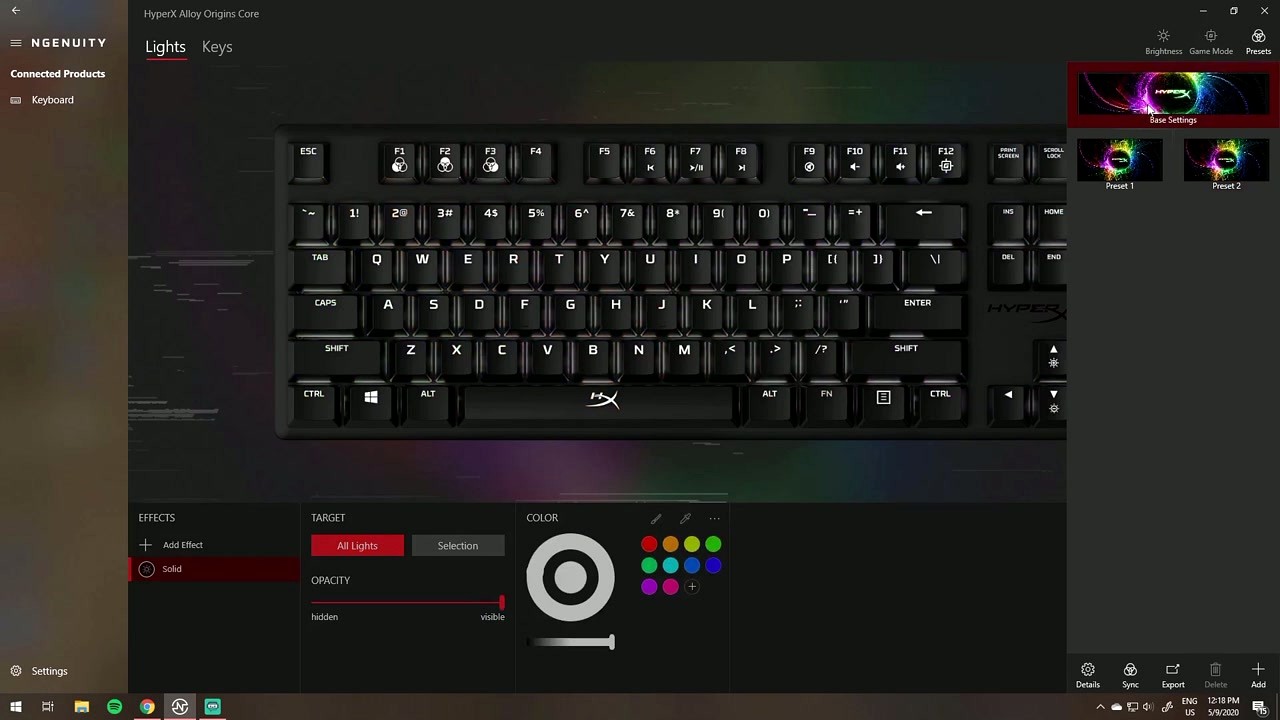
- Click the Lighting tab in the sidebar (or top navigation bar, depending on your app version). You will see the current lighting effect applied to the keyboard.
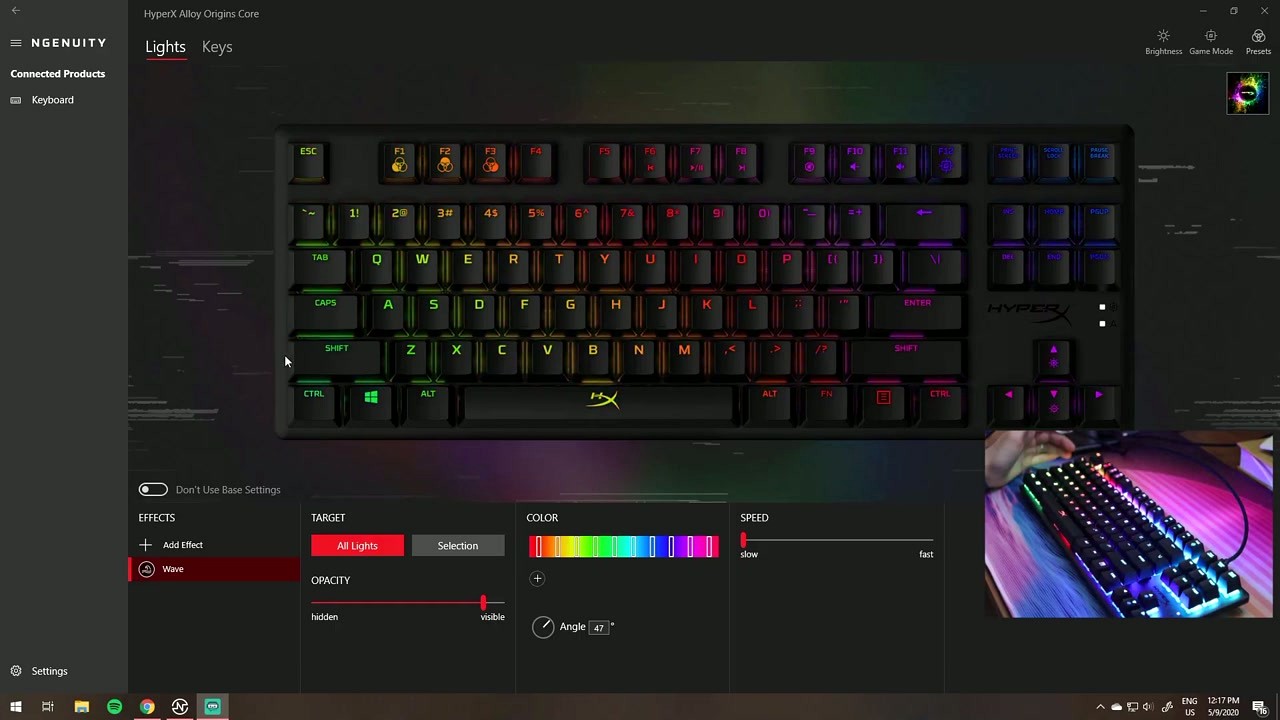
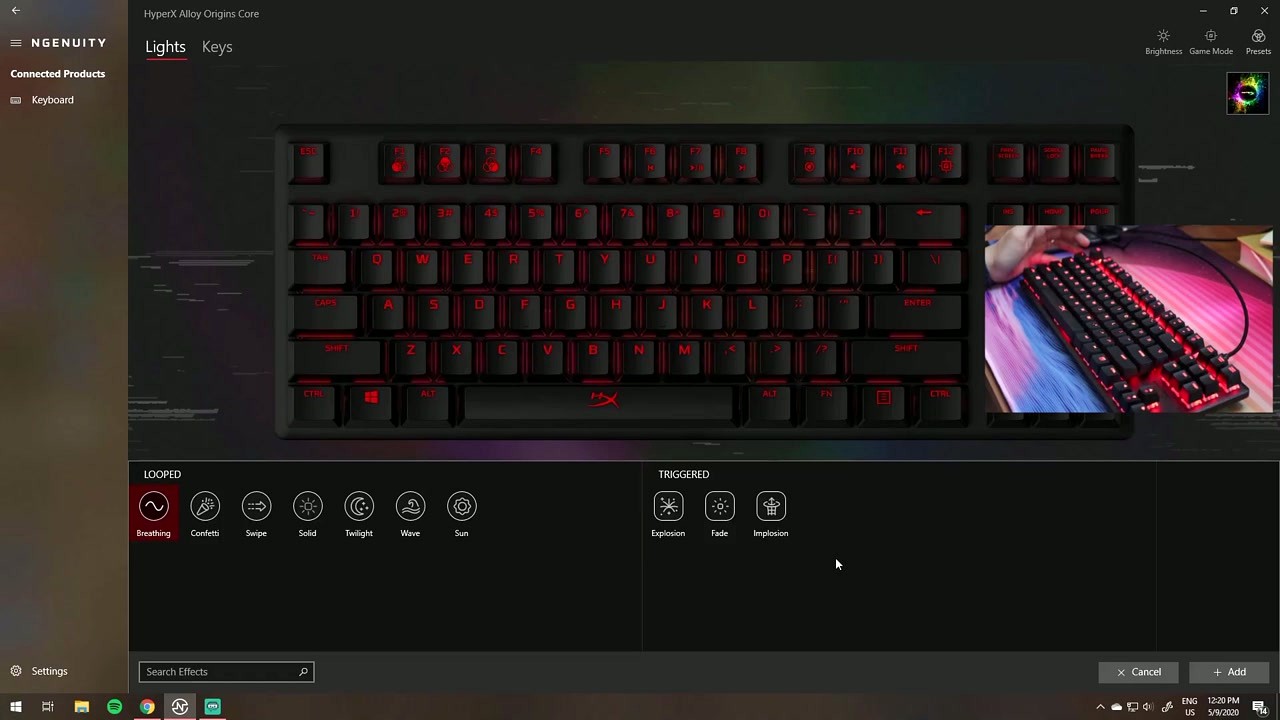
- Pick an effect. The effect dropdown sits at the top of the lighting panel. Choose from options like Solid, Breathing, Wave, Reactive, Rain, Ripple, and more. Each effect has its own set of parameters below.
- Customize colors. Click the color picker to set the primary color. For multi-color effects like Wave, you can add multiple color stops along a gradient bar. Drag the Brightness slider to control intensity (75% is a good starting point that balances visibility and eye comfort).
- Per-key lighting. Switch to “Custom” mode, then click individual keys on the keyboard layout to assign specific colors. Hold Ctrl to select multiple keys at once. This is great for highlighting WASD keys in a different color for gaming.
- Save your profile. Click the + icon next to “Profile 1” at the top to create a new profile. Name it something descriptive like “Gaming” or “Work.” Click the save icon (floppy disk) to write the profile to your keyboard’s onboard memory.
Useful keyboard shortcuts in NGENUITY:
| Shortcut | Action |
|---|---|
| Ctrl + Click | Select multiple keys for per-key lighting |
| Ctrl + S | Save current profile to device memory |
| Ctrl + Z | Undo last lighting change |
| Fn + F12 | Cycle through profiles on-device (hardware shortcut) |
Setting up macros is equally straightforward. Navigate to the Macros tab, click Create Macro, then hit Record. Perform the key sequence you want to automate, click Stop, and assign it to any key. You can adjust delay timing between keystrokes and set the macro to play once, repeat a set number of times, or loop until you press the key again.
For mouse users, the DPI tab lets you set up to 5 sensitivity stages. Each stage has an independent DPI value ranging from 200 to 26,000 DPI (depending on your sensor model). Set your preferred stages and use the DPI cycling button on the mouse to switch between them mid-game.
For headset users, open the Audio tab to access the built-in 7-band equalizer. Start with a preset like “FPS” (boosts footstep frequencies) or “Bass Boost,” then tweak individual bands. Adjust microphone gain and sidetone (hearing your own voice in the headset) in the Microphone sub-tab.
Keep the software updated. HyperX pushes updates through the Microsoft Store automatically. If you used the EXE installer, check for updates manually by clicking the gear icon in the app and selecting Check for Updates. Updates often add support for new peripherals and fix bugs that cause device detection failures.
Save profiles to onboard memory. Most HyperX keyboards and mice have onboard storage for 3 profiles. Saving profiles to the device means your settings persist even on PCs without NGENUITY installed. Look for the “Save to Device” or floppy disk icon in the profile section.
Use game-specific profiles. Create separate profiles for different games. NGENUITY supports application-linked profiles that activate automatically when you launch a specific .exe file. Set this up through the profile settings by clicking Link Application and browsing to your game executable.
Common mistakes beginners make:
- Forgetting to save after making changes. Your edits exist only in the software until you explicitly save to device memory.
- Setting DPI too high. Most competitive players run between 400-1600 DPI with a large mousepad. Going above 3200 DPI rarely improves accuracy.
- Stacking too many lighting effects. This drains keyboard processor resources and can cause visible flickering on some models.
Hidden features worth knowing about:
- Preset Library — Access community-made and official lighting presets through the Preset Library icon. These give you polished looks without manual setup.
- Per-key heat maps — Some supported keyboards track keystroke data. Use this to identify your most-used keys and optimize layouts.
- Export/Import profiles — Share your custom profiles with friends by exporting them as files from the profile menu.
Need help? The r/HyperX subreddit has an active community for troubleshooting. For official support, visit the HyperX support page at hyperx.com/pages/support. The official HyperX Discord server is also responsive for quick questions.
Ready to customize your HyperX gear? Grab the latest version and start building your profiles.
Download HyperX NGENUITYFrequently Asked Questions
Answers to the most common questions about downloading, installing, and using HyperX NGENUITY on your Windows PC.
Is HyperX NGENUITY safe to download?
Yes, HyperX NGENUITY is safe to download. It is developed and maintained by HyperX, a gaming peripherals division of HP Inc., one of the largest technology companies in the world. The software is distributed through the Microsoft Store and directly from the official HyperX website at hyperx.com/pages/ngenuity.
The standalone installer (HyperX_NGENUITY_Installer_2.35.0.0.exe, roughly 416 MB) is digitally signed by HP Inc. Windows SmartScreen may show a prompt on first launch because the EXE is less commonly downloaded than the Microsoft Store version, but this is standard behavior for any new executable. The Microsoft Store version goes through Microsoft’s own security review process before publication, adding another layer of verification.
- Download only from the official download links on this page or the Microsoft Store
- Verify the digital signature by right-clicking the EXE, selecting Properties, then Digital Signatures
- Run a scan with Windows Defender or your preferred antivirus after downloading
- Avoid third-party download sites that may bundle adware or modified installers
Pro tip: The Microsoft Store version auto-updates silently and runs in a sandboxed environment, which gives you an extra layer of security over the standalone EXE installer.
For system compatibility details, check our System Requirements section.
Where is the official safe download for HyperX NGENUITY?
The two official sources for HyperX NGENUITY are the Microsoft Store and the HyperX website. Both provide the genuine, unmodified software directly from HP Inc.
The Microsoft Store listing (app ID: 9p1tbxr6qdcx) is the recommended source for most users. It handles installation and updates automatically. The direct EXE installer is available at files.hyperx.com and weighs approximately 416 MB for version 2.35.0.0. Some users on Reddit have reported downloading NGENUITY from third-party sites like SourceForge, but these mirrors may be outdated or repackaged. Stick with official sources to avoid tampered files.
- Open the Microsoft Store on your Windows 10 or 11 PC
- Search for “HyperX NGENUITY” or visit the direct link: apps.microsoft.com/detail/9p1tbxr6qdcx
- Click “Get” or “Install” to begin the download
- Alternatively, visit our Download section for direct links to both the Store page and standalone installer
Pro tip: If the Microsoft Store version fails to install, try resetting the Store cache by running wsreset.exe from the Run dialog (Win+R), then attempt the download again.
See our Getting Started guide for a full installation walkthrough.
Does HyperX NGENUITY work on Windows 11?
Yes, HyperX NGENUITY fully supports Windows 11. The software requires Windows 10 version 1903 or later (64-bit only), which means all Windows 11 builds are compatible since Windows 11 is a newer release in that same line.
Version 2.35.0.0 has been tested on Windows 11 23H2 and 24H2 without major compatibility issues. That said, some users on the r/HyperX subreddit have reported occasional device detection problems after large Windows 11 feature updates. These are typically resolved by restarting the NGENUITY app or reinstalling it from the Microsoft Store. The app requires at least an Intel Core i5 or AMD equivalent processor, 4 GB of RAM, and about 2 GB of free disk space.
- Windows 11 Home, Pro, and Enterprise editions are all supported
- Both Intel and AMD processors work without issues
- USB 2.0 or higher is required for peripheral communication
- Internet connection is needed for firmware updates and cloud sync
Pro tip: If NGENUITY stops detecting your devices after a Windows 11 update, go to Settings > Apps > Installed apps, find HyperX NGENUITY, click the three dots, and select “Repair” before resorting to a full reinstall.
Check the full hardware specs in our System Requirements section.
Is HyperX NGENUITY available for macOS or Linux?
No, HyperX NGENUITY is a Windows-only application. There is no macOS or Linux version available as of version 2.35.0.0, and HyperX has not announced plans to release one.
This is a real limitation if you use a Mac or Linux workstation with HyperX peripherals. However, most HyperX devices store profiles in onboard memory, which means settings you configure on a Windows machine carry over when you plug the peripheral into a Mac or Linux system. Keyboards like the Alloy Origins series and mice like the Pulsefire Haste store up to three onboard profiles. You can configure them on any Windows PC, save to onboard memory, then use the peripheral on your Mac without the software.
- Configure all profiles and lighting on a Windows PC first
- Save profiles to onboard memory (not cloud) using the device’s memory slot selector in NGENUITY
- Plug the peripheral into your Mac or Linux machine — stored settings persist
- Basic functions (volume, mute, media keys) work natively on macOS without NGENUITY
Pro tip: HyperX does offer a mobile companion app (HyperX NGENUITY on Google Play and the App Store) that provides limited control for some headset features like EQ and mic monitoring, which works on both iOS and Android.
Browse the full list of supported platforms in our Features section.
What HyperX devices are compatible with NGENUITY?
HyperX NGENUITY supports a wide range of HyperX keyboards, mice, headsets, and microphones. Not every HyperX product works with it, and there are two versions of the software with different device lists.
The current NGENUITY (version 2.35.0.0) supports newer peripherals released from roughly 2019 onward. Older devices from before that era require the legacy NGENUITY software, which is a separate download. Some recent devices released after August 2025 may only be supported in the NGENUITY beta. Check the official HyperX compatibility page at hyperx.com/pages/ngenuity for the definitive list, as it gets updated with each firmware release.
- Keyboards: Alloy Origins, Alloy Origins Core, Alloy Origins 60, Alloy Origins 65, Alloy Elite 2, Alloy Rise, Alloy Rise 75, Alloy MKW100
- Mice: Pulsefire Surge, Pulsefire Raid, Pulsefire Dart, Pulsefire FPS Pro, Pulsefire Core, Pulsefire Haste
- Headsets: Cloud Alpha, Cloud II, Cloud Mix, Cloud Orbit, Cloud Flight
- Microphones: QuadCast, QuadCast S, DuoCast
Pro tip: If your device does not appear in NGENUITY after connecting, check whether it needs the legacy version instead. The legacy NGENUITY is a separate download from the HyperX support page and covers older peripherals that the new version dropped.
Visit our Features section for details on what you can customize per device type.
Is HyperX NGENUITY completely free to use?
Yes, HyperX NGENUITY is 100% free with no paid tiers, subscriptions, or premium features locked behind a paywall. Every feature in the software is available at no cost.
This includes RGB lighting customization, macro programming, DPI configuration, audio EQ adjustments, microphone settings, device profiles, game-specific profile switching, firmware updates, and cloud sync. Unlike some competing peripheral software (Corsair iCUE has optional paid integrations, for example), NGENUITY does not upsell you on anything. The software is provided as a companion tool for HyperX hardware owners, and HP Inc. maintains it as part of their product support commitment.
- No subscription fees or recurring charges
- No premium/pro version with extra features
- No in-app purchases or locked content
- Cloud sync for saving profiles across machines is included free
- Firmware updates for your peripherals are free through the app
Pro tip: The only “cost” is disk space. The installer weighs about 416 MB, and after installation the app uses around 2 GB of storage. If you are running low on disk space, the Microsoft Store version can be installed to an external drive through Windows Settings > System > Storage > Advanced storage settings.
Download it now from our Download section at no cost.
Do I need a HyperX account to use NGENUITY?
No, you do not need a HyperX account or any account to use the core features of NGENUITY. You can install the software, connect your peripherals, and start customizing RGB lighting, macros, and DPI settings without signing in.
An account only becomes relevant if you want to use cloud sync to save your profiles and access them on multiple computers. Cloud sync stores your device configurations on HyperX servers so you can restore them after reinstalling Windows or when setting up a new PC. For most users who only have one gaming setup, local profiles stored on the device or your PC are sufficient. The Preset Library (community-shared lighting effects and configs) may also require a sign-in to browse and download user-submitted presets.
- Local device profiles work without any account
- Onboard memory profiles (stored on the peripheral itself) do not need any login
- Cloud sync and the Preset Library require a free HP/HyperX account
- You can create a free account at any time from within the app
Pro tip: Even if you skip the account, always save your important profiles to onboard device memory. That way your settings survive a full Windows reinstall or a switch to a different PC without any cloud dependency.
Learn how to set up profiles in our Getting Started guide.
How do I download and install HyperX NGENUITY step by step?
You can install HyperX NGENUITY in under five minutes through either the Microsoft Store or the standalone installer. The Microsoft Store method is simpler and handles updates automatically.
The standalone EXE installer (version 2.35.0.0, about 416 MB) gives you more control over the installation path but requires manual updates. Both methods install the same application with identical features. The installer requires Windows 10 version 1903 or later, 64-bit only, with at least 2 GB of free disk space.
Microsoft Store method:
- Open the Microsoft Store app on your PC (press Win key, type “Microsoft Store”)
- Search for “HyperX NGENUITY” in the search bar
- Click “Get” or “Install” on the app listing page
- Wait for the download and installation to complete (a few minutes on broadband)
- Launch NGENUITY from the Start menu and connect your HyperX peripheral via USB
Standalone installer method:
- Visit our Download section and click the direct download link
- Run the downloaded HyperX_NGENUITY_Installer_2.35.0.0.exe file
- If Windows SmartScreen appears, click “More info” then “Run anyway”
- Follow the installer prompts and choose your installation directory
- Launch NGENUITY and plug in your HyperX device
Pro tip: Connect your HyperX peripheral before launching NGENUITY for the first time. The app scans for connected devices on startup and will prompt you to update firmware if a newer version is available.
For a more detailed walkthrough, read our Getting Started guide.
How to fix HyperX NGENUITY installation errors on Windows?
Installation errors with HyperX NGENUITY usually come from corrupted Microsoft Store cache, outdated Windows versions, or conflicts with previous installations. Here are the most common fixes.
The most frequent error is the Microsoft Store version failing mid-download or getting stuck at “Pending.” This happens when the Store cache is corrupted, which is more common than you would expect after Windows feature updates. The standalone installer can fail if you have remnants of a previous NGENUITY installation or if your .NET framework is outdated. Both scenarios are fixable without contacting support.
- Reset Microsoft Store cache: Press Win+R, type
wsreset.exe, press Enter. Wait for the Store to reopen, then retry the install - Check Windows version: Go to Settings > System > About. You need Windows 10 version 1903+ (64-bit). Update Windows if you are on an older build
- Remove old installation: Go to Settings > Apps > Installed apps, uninstall any existing HyperX NGENUITY entry, restart your PC, then reinstall
- Repair the app: Settings > Apps > Installed apps > HyperX NGENUITY > Advanced options > Repair. If that fails, try Reset (this clears all app data)
- Try the other installer: If the Store fails, use the standalone EXE from our Download section, or vice versa
Pro tip: If you get error code 0x80070005 during installation, run the Microsoft Store troubleshooter: Settings > System > Troubleshoot > Other troubleshooters > Windows Store Apps.
For the full installation process, see our Getting Started guide.
How to fix HyperX NGENUITY not detecting my device?
Device detection failures are the single most reported issue with HyperX NGENUITY. The fix depends on whether the problem is a USB connection issue, a software version mismatch, or a driver conflict.
This problem is especially common with headsets like the Cloud III and Cloud Alpha series, and often surfaces after Windows updates or NGENUITY updates. The r/HyperX subreddit has dozens of threads about this, and the root cause varies. Some devices require the legacy NGENUITY instead of the current version, and plugging into the wrong USB port (USB 2.0 vs 3.0) can also cause detection failures. USB hubs are another frequent culprit.
- Try a different USB port: Plug the device directly into a motherboard USB port, not a hub or front-panel port. Try both USB 2.0 and 3.0 ports
- Restart NGENUITY: Close the app completely (check System Tray), wait 10 seconds, relaunch it
- Check Device Manager: Open Device Manager (Win+X > Device Manager), expand “Human Interface Devices” and “Sound” sections. Look for your HyperX device. If it shows a yellow warning icon, right-click and update the driver
- Repair the app: Settings > Apps > HyperX NGENUITY > Advanced options > Repair, then Reset if Repair does not work
- Reinstall completely: Uninstall NGENUITY, restart your PC, reinstall from the Microsoft Store or our Download section
- Check version compatibility: Verify your device is listed in the current NGENUITY version. Older devices may need the legacy NGENUITY from the HyperX support page
Pro tip: Disable other peripheral management software (Omen Gaming Hub, Razer Synapse, Corsair iCUE) before launching NGENUITY. These apps sometimes claim exclusive USB access and block NGENUITY from detecting your devices.
For complete setup instructions, visit our Getting Started guide.
Why does HyperX NGENUITY keep crashing or freezing?
Crashes and freezes in HyperX NGENUITY are typically caused by driver conflicts, corrupted app data, or USB communication errors between the software and your peripheral.
Multiple users on forums and YouTube troubleshooting videos have traced crash loops to conflicting RGB software running simultaneously. NGENUITY, Corsair iCUE, and Omen Gaming Hub all try to communicate with USB HID devices, and running them at the same time can cause instability. Corrupted local settings are another common trigger, especially after failed firmware updates. The app stores configuration data locally, and if that data gets corrupted, NGENUITY may crash on startup before reaching the main interface.
- Close conflicting software: Quit Razer Synapse, Corsair iCUE, Logitech G Hub, and Omen Gaming Hub before running NGENUITY
- Reset app data: Go to Settings > Apps > HyperX NGENUITY > Advanced options > Reset. This clears all cached data and forces a fresh start
- Update to the latest version: Open the Microsoft Store, go to Library, and check for NGENUITY updates. Version 2.35.0.0 fixed several stability issues present in earlier builds
- Run as administrator: Right-click the NGENUITY shortcut, select “Run as administrator.” Some USB operations require elevated permissions
- Check USB connection: Unplug all HyperX peripherals, close NGENUITY, plug devices back in one at a time, then relaunch the app
Pro tip: If NGENUITY crashes immediately on launch, rename or delete the folder at %LocalAppData%PackagesHyperXNGENUITY_ (the Microsoft Store app data folder). The app will recreate it with fresh defaults on next launch. You will lose saved profiles not stored on the device, so back up to onboard memory first if possible.
Check our System Requirements section to confirm your hardware meets the minimum specs.
HyperX NGENUITY stopped working after a Windows update – how to fix?
Windows updates frequently break NGENUITY because they can reset USB drivers, change security permissions, and modify the app sandbox environment. This is one of the most common complaints on r/HyperX after major Windows 11 feature updates.
Windows 11 24H2 in particular caused widespread issues with Microsoft Store apps, including NGENUITY. The fix is almost always a combination of repairing or reinstalling the app and updating USB drivers. In rare cases, a Windows update changes how the OS handles HID (Human Interface Device) drivers, which breaks communication between NGENUITY and your peripherals until updated drivers are installed.
- Repair the app first: Settings > Apps > HyperX NGENUITY > Advanced options > Repair
- Update USB drivers: Open Device Manager > Universal Serial Bus controllers. Right-click each entry and select “Update driver”
- Reinstall NGENUITY: Uninstall it completely, restart your PC, then reinstall from the Microsoft Store
- Check for pending Windows updates: Sometimes a follow-up patch fixes the issue. Go to Settings > Windows Update > Check for updates
- Roll back the problematic update (last resort): Settings > Windows Update > Update history > Uninstall updates. Only do this within 10 days of the update
Pro tip: After any major Windows update, open NGENUITY and re-save your device profiles. Some updates reset the app’s device associations, and re-saving forces the software to re-establish communication with each peripheral.
Visit our Download section for the latest installer version.
How do I update HyperX NGENUITY to the latest version?
The update method depends on how you installed NGENUITY. The Microsoft Store version updates automatically in the background. The standalone EXE version requires a manual download of the latest installer.
The current latest version is 2.35.0.0. Microsoft Store users typically receive updates within a few days of release. If auto-updates are enabled in the Store settings (Library > Get updates), you should not need to do anything. For the standalone installer, there is no built-in auto-updater, so you need to check the HyperX website or our download page periodically. NGENUITY also handles firmware updates for your connected peripherals. When you open the app, it checks for available firmware and prompts you to install if one is found.
Microsoft Store update:
- Open the Microsoft Store app
- Click “Library” in the bottom-left sidebar
- Click “Get updates” to check for all pending updates
- NGENUITY will appear in the list if an update is available
Standalone installer update:
- Visit our Download section for the latest installer link
- Download and run the new installer over the existing installation
- The installer will upgrade in place without removing your settings
Pro tip: After updating NGENUITY, check for firmware updates on each connected peripheral. Open the app, select your device, and look for a notification icon or banner at the top of the device page indicating available firmware.
See our Getting Started guide for firmware update steps.
What is the difference between HyperX NGENUITY and NGENUITY Legacy?
HyperX NGENUITY and NGENUITY Legacy are two separate applications that support different generations of HyperX peripherals. They cannot be used interchangeably.
NGENUITY (the current version, 2.35.0.0) supports newer HyperX devices released from approximately 2019 onward. NGENUITY Legacy supports older HyperX peripherals that were manufactured before that cutoff. The two apps have different codebases, different device databases, and different feature sets. Some users need both installed if they own a mix of older and newer HyperX gear. The legacy version is a traditional Win32 desktop application, while the current NGENUITY is a UWP/packaged app distributed through the Microsoft Store.
- NGENUITY (current): Supports Alloy Origins series, Pulsefire Haste, Cloud Alpha, QuadCast S, and other post-2019 devices. Available on Microsoft Store.
- NGENUITY Legacy: Supports Alloy FPS, Alloy Elite (original), Pulsefire FPS, Cloud Revolver, and other pre-2019 devices. Downloaded from HyperX support page.
- Both can be installed side by side without conflicts
- The legacy version receives minimal updates and is in maintenance mode
Pro tip: If your device is not listed in either version, check the HyperX support page for a standalone firmware updater. Some devices (like the Cloud Alpha Wireless) have dedicated firmware tools separate from NGENUITY.
Check device compatibility in our Features section.
HyperX NGENUITY vs Razer Synapse vs Corsair iCUE – which is better?
Each software only works with its own brand of peripherals, so the “better” choice depends on which hardware you own. But in terms of software quality, Corsair iCUE and Razer Synapse 4 are generally more polished than NGENUITY.
Corsair iCUE (around 150-300 MB RAM usage) offers the deepest RGB customization with cross-device lighting scenes and regular updates. Razer Synapse 4 improved significantly over version 3 with 30% faster performance and a cleaner interface. HyperX NGENUITY has a simpler, cleaner design and lighter resource footprint, but users on Reddit and Tom’s Hardware have criticized it for slower development and occasional stability issues compared to the competition. The beta status of NGENUITY’s newer features is a legitimate concern.
- HyperX NGENUITY: Free, clean interface, lighter on resources, but slower update cadence and has been called “buggy” by community reviewers. Best for casual customization.
- Razer Synapse 4: Cloud-based profiles, fast performance, strong macro engine, but requires an online account for full features. Best for power users in the Razer ecosystem.
- Corsair iCUE: Most feature-rich, best RGB scene engine, regular updates, but heavier on system resources (150-300 MB RAM). Best for deep RGB enthusiasts.
- Logitech G Hub: Clean and simple, decent macro support, but limited compared to iCUE for lighting. Good middle ground.
Pro tip: If you own peripherals from multiple brands, avoid running more than one peripheral software at startup. Each one polls USB devices continuously and they can conflict. Use Windows Task Scheduler to launch only the one you need.
Explore what NGENUITY offers in our Features section.
How do I set up macros in HyperX NGENUITY?
Setting up macros in NGENUITY takes about two minutes per macro. You can record key sequences, mouse actions, and delays, then assign them to any programmable key or button on your HyperX peripheral.
Macros are stored per-profile, so you can have different macro sets for different games or applications. NGENUITY supports both recorded macros (where you physically press keys and the software captures the sequence) and manual macro creation (where you add individual keystrokes and delays by hand). The manual method gives you precise control over timing, which matters for game macros where frame-perfect inputs are important.
- Open NGENUITY and select your keyboard or mouse from the device list
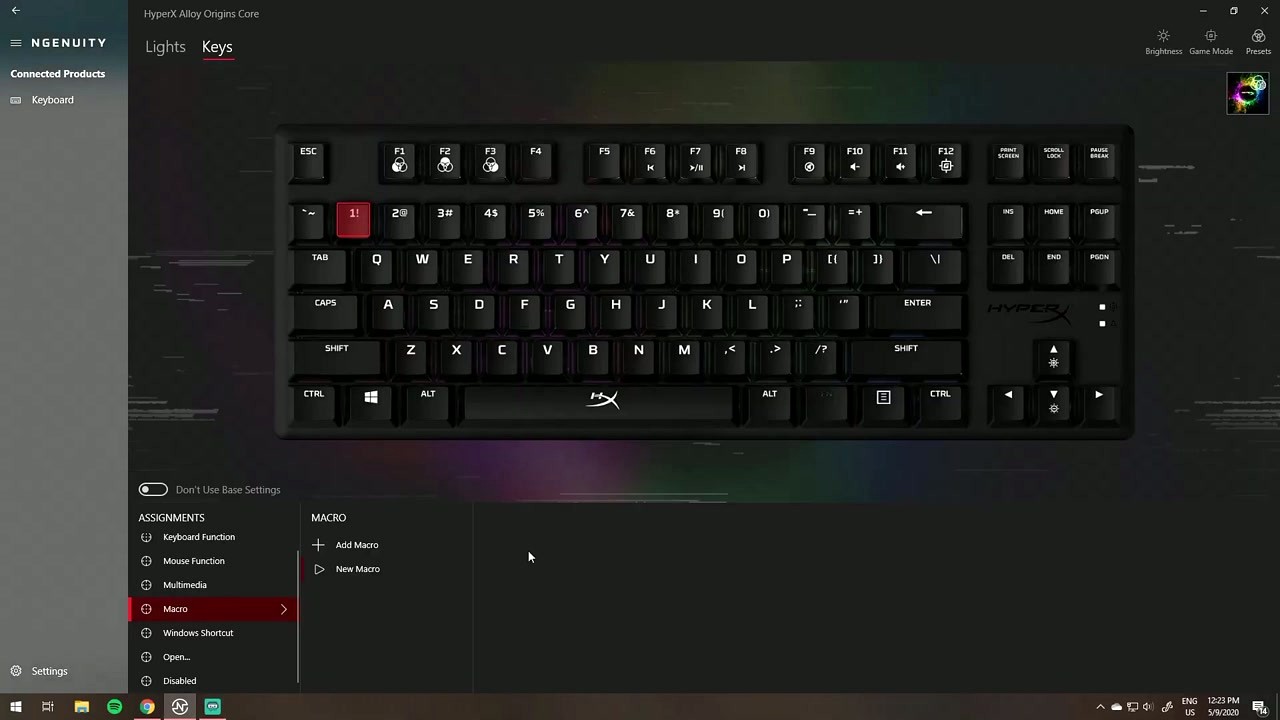
- Click on the key or button you want to assign a macro to
- Select “Macro” from the assignment options
- Choose “Record” to capture a key sequence in real time, or “Create” to build one manually
- If recording, press the keys you want in the macro, then click “Stop Recording”
- Adjust delays between keystrokes if needed (default captures actual timing)
- Name the macro and click “Apply”
Pro tip: For gaming macros, set delays to fixed values (like 50ms between each keystroke) rather than using recorded timing. Recorded timing includes your human reaction delays, which add unnecessary lag. You can edit delays after recording by clicking on each step in the macro editor.
Read our Getting Started guide for a full walkthrough of macro creation.
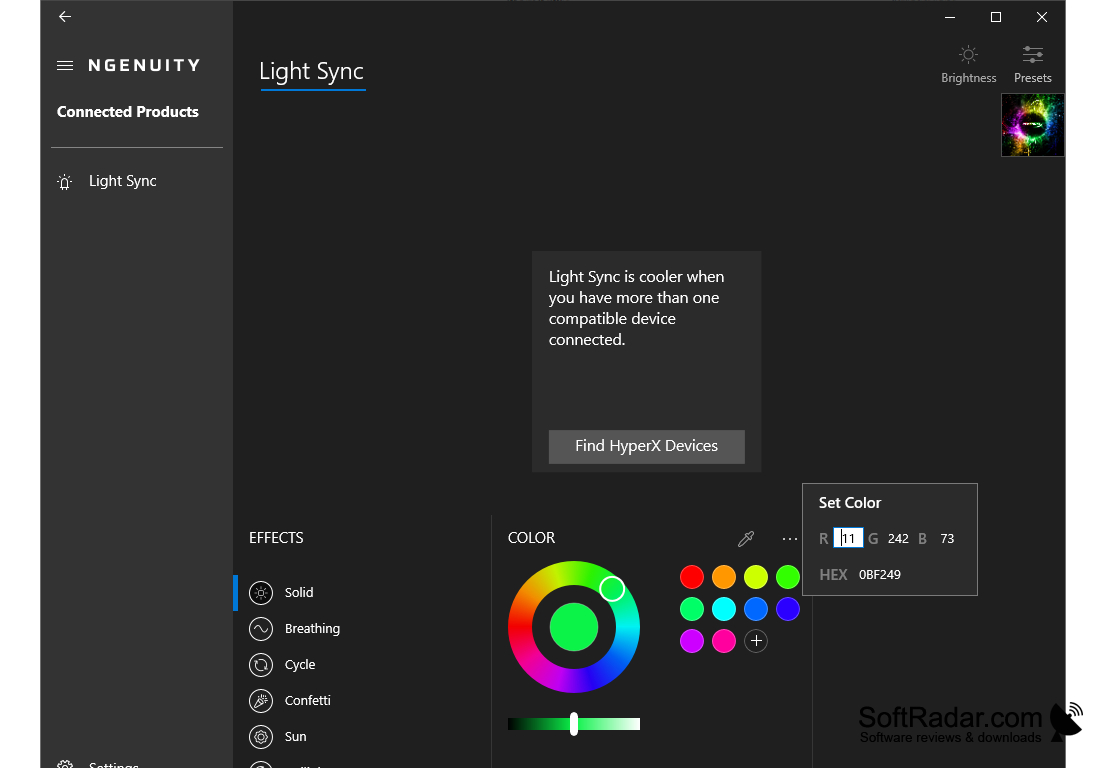
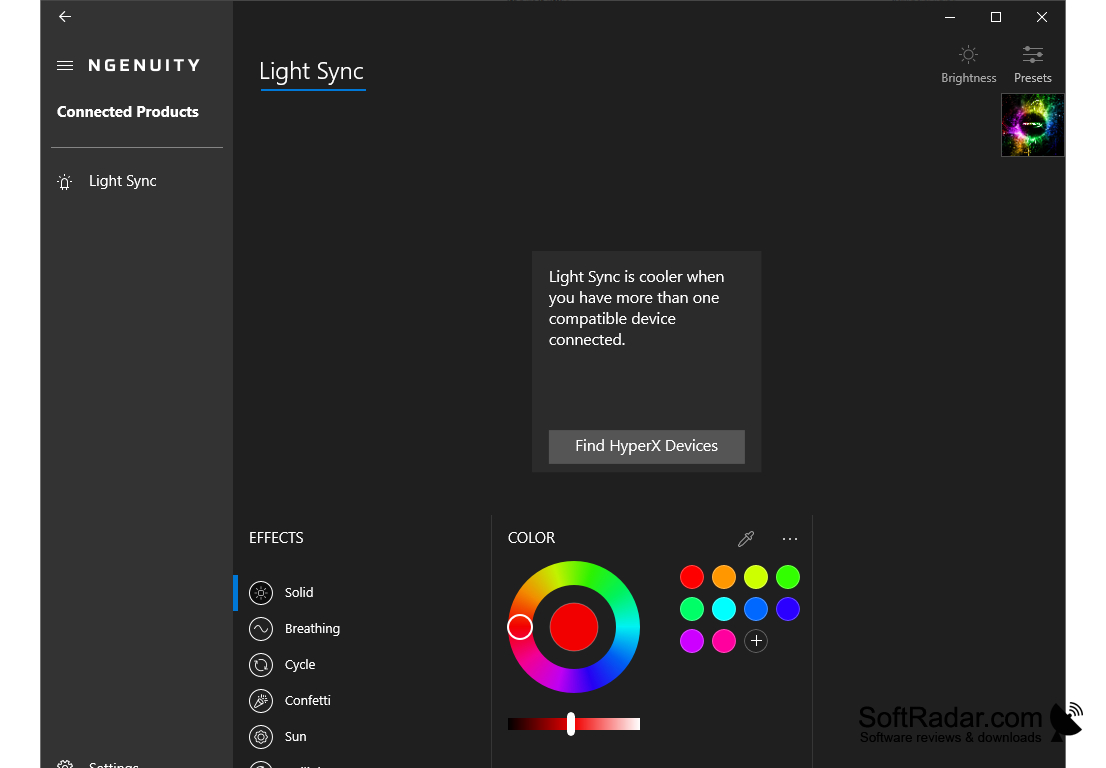
How do I customize RGB lighting and per-key effects in NGENUITY?
NGENUITY gives you full control over RGB lighting on compatible keyboards and mice, including per-key color assignment, preset effects, and custom lighting layers.
The lighting editor in NGENUITY works in two modes: preset effects (Wave, Breathing, Solid, Reactive, and others) and per-key custom mode. Preset effects apply animation patterns across your entire keyboard or mouse with adjustable speed, direction, and color palette. Per-key mode lets you assign individual colors to each key on supported keyboards like the Alloy Origins series and Alloy Rise. You can combine both approaches by layering a base effect with per-key overrides on specific keys.
- Select your keyboard or mouse in NGENUITY
- Navigate to the “Lighting” tab in the left sidebar
- Choose a preset effect or select “Per-Key” mode
- For presets: adjust color palette, speed, direction, and brightness using the sliders
- For per-key: click individual keys on the keyboard visualization, then pick a color from the color wheel or enter a hex code
- Adjust overall brightness using the brightness slider (0-100%)
- Save the configuration to your active profile
Pro tip: Save your favorite lighting setups to different onboard memory slots (most Alloy keyboards support 3 slots). You can then switch between them using the keyboard’s hardware profile button without opening NGENUITY at all.
View all lighting capabilities in our Features section.
How do I change DPI settings for my HyperX mouse in NGENUITY?
You can configure DPI stages, polling rate, and sensitivity curves for any compatible HyperX mouse directly in NGENUITY’s DPI settings panel.
Most HyperX mice like the Pulsefire Haste and Pulsefire Surge support multiple DPI stages (typically 3-5 presets) that you can cycle through using the DPI button on the mouse. NGENUITY lets you set the exact DPI value for each stage, ranging from 200 DPI to the sensor’s maximum (16,000 DPI on the Pulsefire Haste, for example). You can also adjust the polling rate (125Hz, 250Hz, 500Hz, or 1000Hz) and enable angle snapping or lift-off distance adjustments on supported models.
- Connect your HyperX mouse and open NGENUITY
- Select your mouse from the device list
- Click the “DPI” or “Sensitivity” tab
- You will see your current DPI stages listed as colored blocks
- Click on a stage to change its DPI value using the slider or by typing a number
- Add or remove DPI stages using the + and – buttons
- Set the polling rate from the dropdown (1000Hz recommended for gaming)
- Click “Apply” to save the configuration
Pro tip: For FPS games, most competitive players use 400-800 DPI with a large mousepad. Set your first DPI stage to your gaming DPI and a second stage to 1600+ DPI for desktop use. Use the DPI button on your mouse to switch between them instantly.
Learn more about mouse customization in our Features section.
Still have questions? Visit the official HyperX Support page or browse the r/HyperX community.